


高価な【水素水】の謎!根拠のない効果、ニセ科学に踊らされている?ブームに警笛
People & Products
やっぱり不自然だった番組降板『ジャンポケ斉藤』が性的暴行の疑いで書類送検!体調不良を…
News & Topics

パリ選手村にエアコンがない!?エコ五輪も近年の熱波で迫られる欧州の暑さ対策
News & Topics

白石麻衣の”ほくろ”がない?過去には朝日奈央も除去、決められたチャームポイントがコン…
Hot & Cool
-

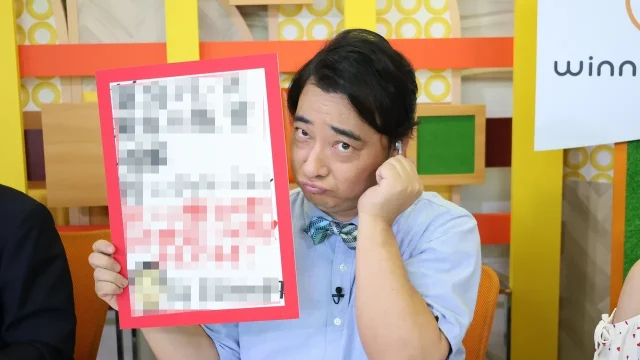
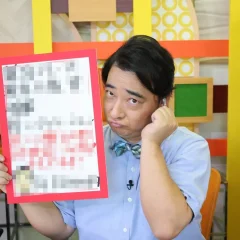
やっぱり不自然だった番組降板『ジャンポケ斉藤』が性的暴行の疑いで書類送検!体調不良を心配されるも事態は一変
2024.10.8|News & Topics
出典:ジャングルポケット斉藤 (@chsaito) / X 今月7日、お笑いトリオ「ジャングルポケット」(通称ジャンポケ)の斉藤慎二(41)が、警視庁から書類送検されたことがマスコミ… -
『おむすび』令和の朝ドラにも30年前と変わらない「あの頃のB’z」主題歌『イルミネーション』はエモすぎる
2024.10.6|Hot & Cool
画像:おむすび - NHK 2024年の秋(9月30日)から始まった、NHKの連続テレビ小説(通称「朝ドラ」)『おむすび』、その主題歌をB'zが担当している。ただ一般的にB'zといえ… -
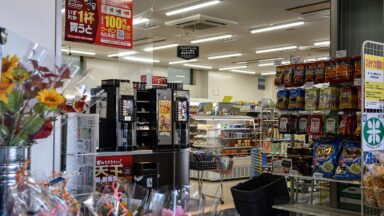
セブン&アイが買収される?円安?国力低下?便利な日本の象徴”コンビニ”の巨人セブンイレブンがなぜ外資に狙われるのか
2024.8.21|News & Topics
今月19日、セブン&アイ・ホールディングスは、カナダのコンビニエンスストアや小売店を展開する大手アリマンタシォン・クシュタールから買収提案を受けていることが経済紙を中心に報道された。 … -
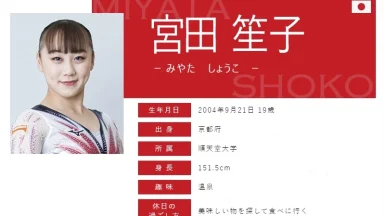
パリ五輪代表の宮田笙子が喫煙と飲酒で辞退!たかがタバコ?法律のズレと教育や対処方法に問題も
2024.7.20|News & Topics
昨日、喫煙の疑いが浮上した体操女子でパリ五輪代表の宮田笙子(19=順大)を事前合宿地のモナコから帰国させていたが、直接聞き取り調査を行った結果「喫煙と飲酒行為」が発覚、日本体操協会は19日、都内で…
最近の記事過去の記事
-

パリ選手村にエアコンがない!?エコ五輪も近年の熱波で迫られる欧州の暑さ対策
2024.7.16|News & Topics
いよいよ7月26日に開幕が迫った2024年パリオリンピックだが、これから現地に向かう選手のほとんどが利用する選手村は、セーヌ川沿いの広大な敷地に82棟、約7200部屋が用意されてるという。 … -
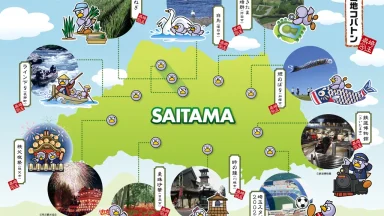
『翔んで埼玉』なぜ県民は「ダサい」を受け入れ笑えるのか?「陽だまりの埼玉」という結論
2023.11.23|Hot & Cool
埼玉県にとって『翔んで埼玉』などという茶番映画が出来てしまうのが良いのか悪いのかわからないが、埼玉県というのは昔から色々と虐げられた(笑)存在なのは間違いない。筆者も生まれながらにして生粋の埼玉県…
-
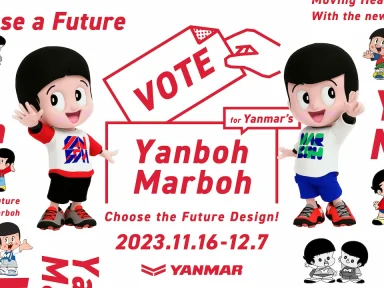
ヤン坊マー坊の新デザインは一般投票で!現在はCG化するも天気予報を知らない世代に浸透ぜず?
2023.11.21|Hot & Cool
耕作機器や船舶などで有名なヤンマー(YANMAR)の公式キャラクター「ヤン坊」と「マー坊」。「ヤン坊マー坊」と言えば「天気予報」で、少なくとも30代以上の人なら耳にこびり付いているであろう「僕の名… -
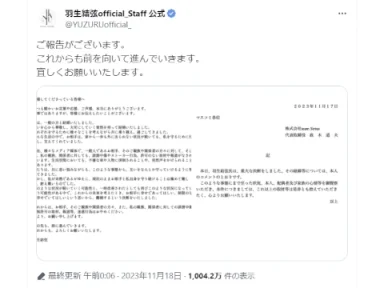
羽生結弦がスピード離婚!短すぎる結婚生活に何が?中世的でミステリアスを演じることの弊害
2023.11.18|News & Topics
フィギュアスケート男子のオリンピック金メダリストで、現プロスケーターの羽生結弦さん(28)が17日の深夜に離婚を決断したと公式X(旧ツイッター)を通して発表、今年8月4日に一般女性との結婚を発表し…
-

白石麻衣の”ほくろ”がない?過去には朝日奈央も除去、決められたチャームポイントがコンプレックスの場合も
2023.11.16|Hot & Cool
元乃木坂46の初期メンバーにして絶対的エースだった、女優の白石麻衣(31才)。 アイドル時代から大人びた妖艶さがありファンのみならず人気を集め、乃木坂時代の2017年に発売された2nd写真集… -

納豆?糸引くマフィン”無添加”焼き菓子店の衛生管理が大炎上!食中毒対応でも批判殺到
2023.11.14|News & Topics
13日~14日にかけてSNSでは何故か「マフィン」に関連したワードがトレンドに溢れた。一見、流行りの美味しいスイーツがバズってるのかと思いきや、まさかの食中毒に関する大炎上。いったい何が起こってい…
-
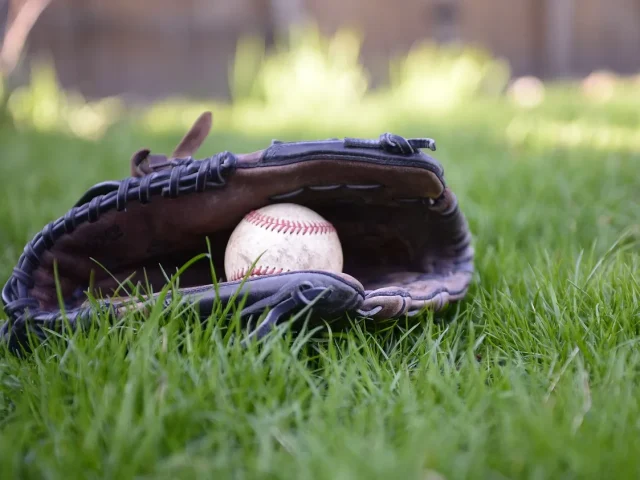
大谷翔平が全ての小学校に6万個の野球グローブ寄贈!気になる費用とスポンサーの影
2023.11.9|News & Topics
エンゼルスからFAとなり、その去就が注目を集める大谷翔平選手が、自身のインスタグラムで自身が試合で使うニューバランス社製のジュニア用グローブ(グラブ)を日本全国、すべての小学校に寄贈することを表明… -
オワコンを指摘された宮迫博之の反応は?牛宮城の成功で余裕?助っ人の加入に自信も
2023.11.8|News & Topics
最近、めっきりネットでも話題に上らなくなっていた、元お笑いコンビ「雨上がり決死隊」の宮迫博之(53)だが「オワコン」だという、何やらあまり嬉しくないことで注目を集めている。 YouTubeチ…
![Netsqueak[ネットスクイーク]](https://netsqueak.com/wp-content/uploads/tcd-w/footer-image.png "Netsqueak[ネットスクイーク]")